There are several ways to make blackberry liqueur. Or any kind of liquor. Perhaps the easiest thing to do is with vodka. Vodka is fairly neutral in smell and taste and colorless, but you can also use rum or brandy. I used a regular simple vodka in this recipe.
Because I read online about different ratios of fruit, vodka, water and sugar, I made different drinks with differences in the treatment of the blackberries and the preserving time.
I compared these with each other and whether there were any taste differences, and came up with the recipe below.
Making liqueur from blackberries
You can use fresh blackberries, which you can mainly pick between August and October. But blackberries from the freezer could also be used.
In a previous blog Making your own blackberry juice, I go into more detail about the rules and the ‘Do’s and Don’ts’ about picking blackberries.
Soaking fruit, nuts, spices and herbs in a liquid and allowing it to steep for some time is a cold form of extraction and is called maceration.
We make this liqueur based on vodka, which is a lot easier than distilling, for example. And you need relatively few things and besides the waiting time, you have actually made the drink in no time.
Ingredients and supplies
-500 grams of blackberries
-350 ml vodka of at least 40% alcohol
-Sterile glass jar or one liter preserving jar with lid
Don’t have a scale? Then you could use the ratio of 2 parts spirits, 2-4 parts fruit and then 1 part sugar syrup, of which 1/3 part is sugar and 2/3 part is water.
After preserving:
Sieve or strainer
Cheesecloth
Or coffee filter holder and filter bags
125 grams of granulated sugar
250 ml of water
Glass bottle, carafe or pharmacy jar with cap
Getting started:
Step 1.
For fresh blackberries, first rinse them carefully and let them drain in a colander or sieve. Remove any twigs. Also check if there are any unripe or damaged blackberries and remove them.
If you use frozen blackberries, you can also rinse them, but it is not necessary.
Step 2.
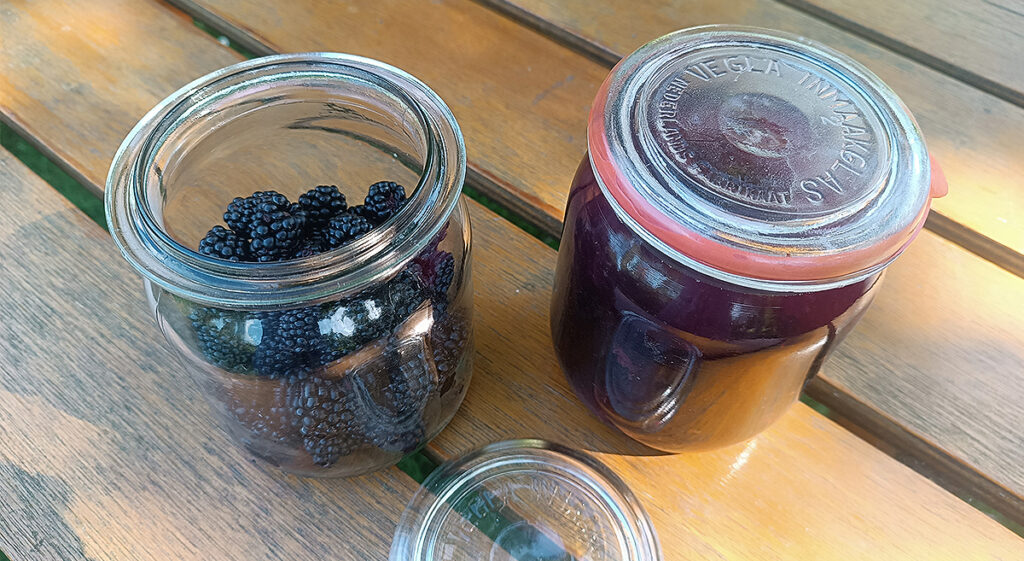
Place the blackberries in the glass jar.
Make sure these are really clean. You can do this by boiling the bottle or jar in a pan of boiling water for a few minutes. Make sure the pot is completely submerged in water. You can use glass tongs to turn it and remove it from the water. Then place it upside down on a clean cloth to let it cool.
I have tried 2 different ways of treating the blackberries and in my opinion, it has not really made any difference.
One way is to leave the blackberries whole and the other way to tamp them down slightly.
Perhaps the latter method is an idea if you do not want or cannot wait a few weeks until the liqueur has it proper taste.
Note: I steeped both the whole blackberries and the slightly tamped blackberries for the same amount of time. So, I don’t know whether tamped blackberries that have been soaked in vodka for a week has the same taste as whole or mashed blackberries that have been soaked for 2 months.
Step 3.
Add the vodka and close the jar(s) tightly.
Step 4.
Now leave the jar or bottle, or several if you have them, in a dry, dark and cool place. Shake the jar or bottle gently every few days.
Step 5.
I soaked my liquor for 2 months. You can also do this a little shorter or longer.
How long you let the drink macerate affects the taste, so this is also a matter of trying it out yourself.
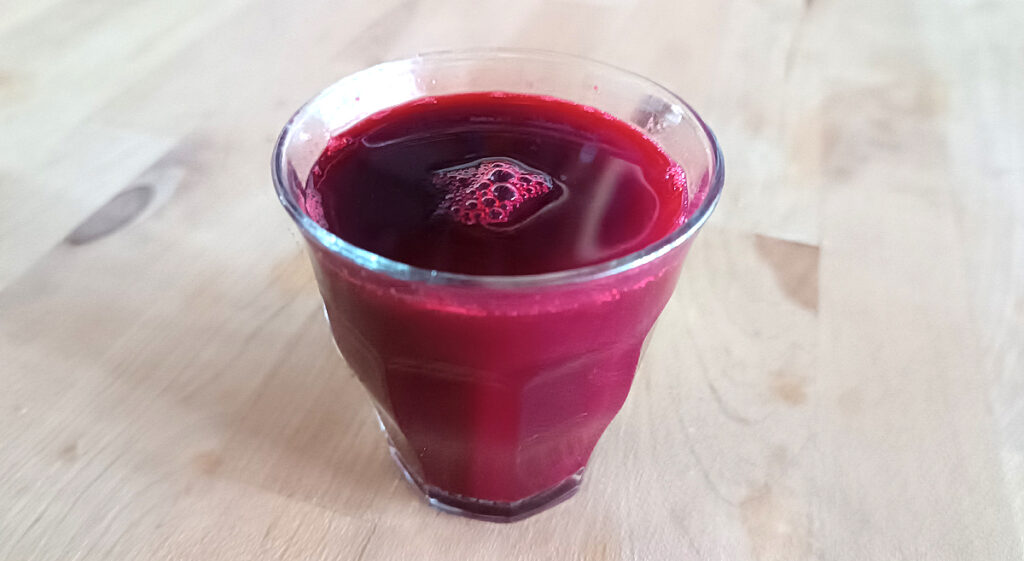
Sieving can also be done in different ways. I did a combination of using a strainer and then coffee filters because I didn’t have a cheesecloth. If you only strain without cheesecloth, small particles can easily get into your liqueur.
Place a sieve over a pan or bowl, place the cheesecloth in it and carefully pour the blackberries into the sieve.
Please note, burrs can leave serious stains, so protect your clothing or cloths well.
If you don’t have cheesecloth, pour the mixture through a sieve or strainer first and then carefully pour the juice through a coffee filter. The easiest thing to do is to use a coffee filter holder.
It may take a while for the drink to pass through this filter. You can then carefully grab the corners and squeeze the filter a bit.
Step 6.
Place water and sugar in a pan and slowly bring it to boil. When all the sugar has dissolved, let the mixture cool.
I chose to add the sugar syrup after filtering the drink, and not right from the start. This way you can better determine how sweet you want the drink.
The ratio of water to sugar in this recipe is what I personally prefer, but you can of course add more sugar and water or less. Or you can also choose not to add sugar syrup at all.
I would say: taste, add some syrup, shake the bottle, taste again, and repeat until you get the right ratio that you like!
And voilà, your own hand made liqueur is ready for consumption!
You can store your blackberry liqueur in a dry, cool and dark place for at least a year.
Variations:
You can also sieve the liqueur after a few weeks and then leave everything again for a few weeks so that the last substances sink to the bottom of the jar. Then sieve again and then add the syrup.
Are you a connoisseur of liqueurs or just want to go a little more professional?
After adding the sugar syrup, leave the bottle for a few weeks or even months to allow the flavors to blend properly. Then taste in between to see if you want to add some more sugar syrup.
Fun facts:
It appears that a liqueur can only be called a liqueur if it contains more than 100 grams of sugar per liter of drink. And the more sugar water, the lower the alcohol percentage becomes.
A liqueur may also only be called a liqueur if it contains at least 15% alcohol.
I am not 100% sure about the amount of alcohol in the liqueur with this recipe, but possibly around 20-25%
If you are a fan of blackberries, or prefer not to have a liqueur, then this non-alcoholic juice might also be something for you. In this blog you will also find more information about nutritional values and picking blackberries.

Hi, my name is Jolinda, and I work as a holistic health practitioner. I provide Reiki and massage treatments, yoga and meditation classes, mindfulness training and happiness coaching.
With my blogs I hope to inspire you to make positive changes into your life. For more ideas and tips check out my page Jolindas inspiration. Free trainings and videos you can find at free downloads and videos
Would you like to be kept informed and inspired? Then sign up for my newsletter.